Knowledge Base
Adding Emails to Copier Address Book
These instructions will show you how to add additional users Email addresses to your Sharp photocopier Address Book. We will do this via the Sharp photocopiers webpage, which is accessed by typing the photocopiers IP address into a web broswer. If you are unsure what the IP address is, please see Find your Photocopier IP Address.
Logging onto your Sharp Photocopier Webpage
01. Open up your web browser (Google Chrome, Internet Explorer or Firefox etc)
02. Type the IP address into the address bar of your web browser as if you were typing in a website address.
03. Once the page is loaded, click [Login] on the top right side, the password is: admin
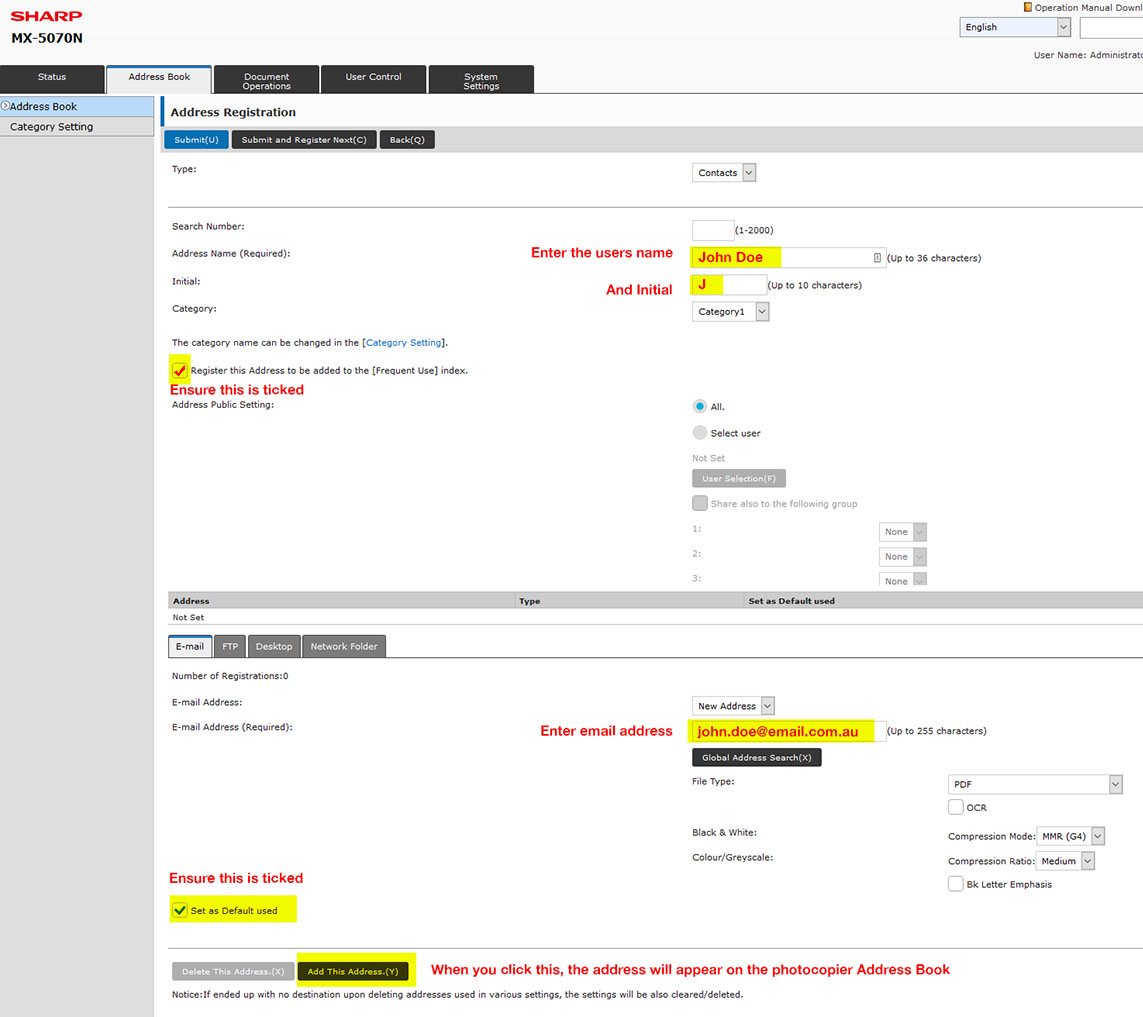
04. Click the [Address Book] tab up the top, click [Add], Fill out as per instructed in the screenshot below
Installing Sharp Photocopier Drivers
Installing the driver for your Sharp Photocopier is easier than ever. Below we have instructions on how to do so on your Windows PC, you can download your Sharp photocopier driver here.
Step 1. Determine what operating system you have
Control Panel > System (or search "System" in your control panel)
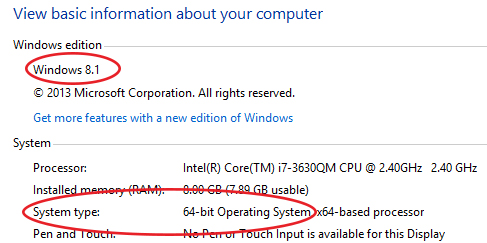
Take note of what edition of Windows you are running Eg. Windows XP, Windows 7, Windows 8, etc.
Also take note of the System type, if it is 64bit or 32bit.
Step 2. Download the Driver
01. Search for your model on the Sharp Drivers page
02. Select your version of Windows (remember if you are running 64bit to select the 64bit option, if you are running 32bit, select the plain option)
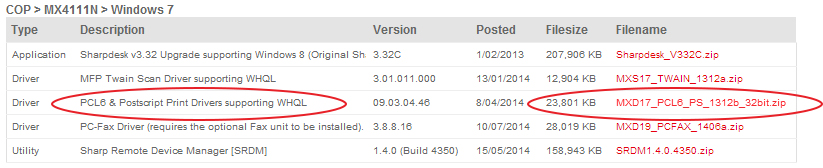
03. A list will load, similar to the image below.
04. Choose the PCL6/Postscript option, click the .zip file on the right to download
Step 3. Installing the Driver
01. Find the [Setup.EXE] and launch
02. Choose [Standard Installation] The setup will then scan your network, locate the photocopier and install. You may have to select your photocopier from the list
Step 4. Configuration
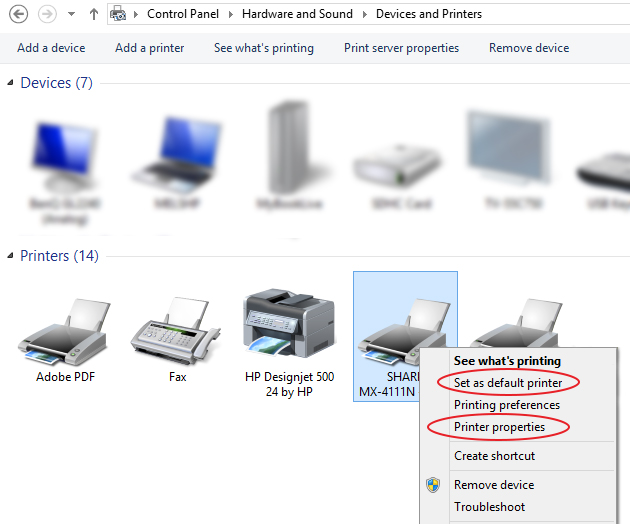
01. Go to your [Devices and Printers] in your [Control Panel]
02. You can right-click on your device and [Set as Default Printer]
03. Right-click your device again and select [Printer Properties]
01. Click on the [Configuration] tab, click [Auto Configure]
02. Move to [Advanced] tab, click [Printing Defaults]
03. (optional) Tick [Black and White Print] box at the bottom (will set default printing to black and white)
04. (optional) If you use account codes move to the [Job Handling] tab, check the [User Number] box and enter your code, apply.
Find your Photocopiers IP Address
Find your Photocopiers IP Address on the Photocopier
01. Tap the [Settings] key in the home screen, select [Status] → [Network Status].
02. If it asks for a login, the password is: admin
Find your Photocopiers IP Address from a Computer
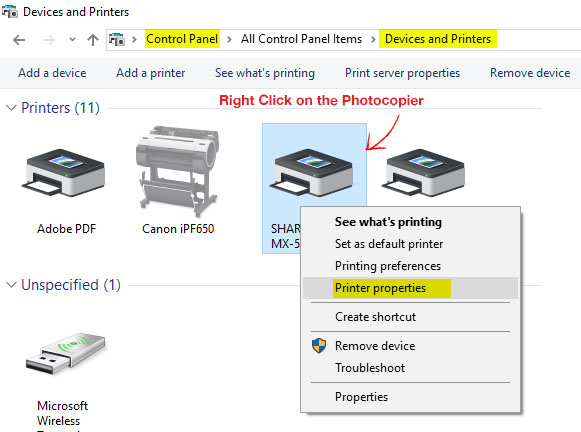
01. On your computer, go to your [Control Panel] then click on [Devices and Printers]
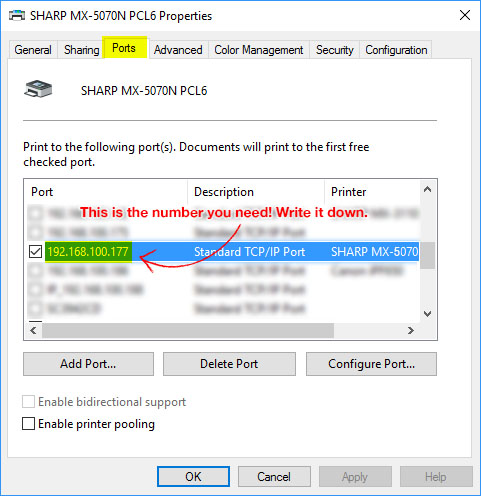
02. Right click on the Sharp Photocopier you wish to complete this on, click on [Printer Properties]
03. Click on the [Ports] tab up the top, take note of the IP Address listed for your Sharp copier (you may need to drag the column to the right to see the whole number. The number sequence should be similar to below screenshot.